10 months ago, I wrote an article on the new features of Ableton Live 10. I was running the beta mode and had a few hours burnt into the software. The idea of writing a second article on the subject came to me amidst various sessions at fellow Adam Husa’s studio, which is running on Live 9. I keep telling him; this is now a given in Live 10… Oh this is so much better in Live 10… And this would be doable in Live 10.
I must admit, one can live with version 9 and still achieve great results… But I’m all in for puns and for improving my workflow, so I see the benefits of upgrading. Note that I am writing this to convince my buddy, not because I receive any sort of compensation. Also note that this article is based off Suite, which I highly recommend.
-
Addition of Wavetable Synthesizer
As Legowelt would agree to, one can never run out of synthesizer in their arsenal. And in that fashion the Wavetable is a welcome addition to the pool of soft synths. Wavetable feels to me like a mix between Granular synthesis and Operator’s Frequency Modulation synthesis. You start off a Sine Wave and let the mayhem happen. I found it particularly impressive for powerful stabs as well as glue-inducing, cloudy pads. A key feature of the synth has to be it’s Unison switch, found on the right-hand side. I am pretty fond of the shimmer function, which pairs pretty well with reverbs for lush pads. Add in a bit of LFO modulation on pitch and you got yourself a massive Cumulus.
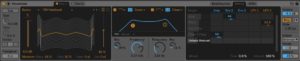
On the flip side, the Wavetable synth is extremely power hungry once you start using its advanced features, thus making it a rather tricky tool to work with. Inside my workflow, I approached it the Granular Synth/Drone way; I use it at the start of a project and “print” audio to a new track, then deactivate the device and keep it stored in a subgroup underneath the freshly bounced track. When using all it’s functions, this synth alone can eat up to 40% of my 6 cores and 32gb of rams.
-
The Echo plugin
Keeping up on the obvious newcomers of version 10, the best addition award has to go Echo. At first I was a bit confused with the arrival of a fourth delay in the native effects of Live, but I must admit that Echo grew on me and found its way in most if not all my projects. Let me elucidate on the subject a bit by bringing into the conversation all of Live’s delays. First we have the Simple Delay which, well, simply repeats a source sound with nothing else added into the signal path. Then we get Ping Pong Delay that has a left/right bounce as well as a filter added into the chain. Note that right-clicking on the top of Ping Pong Delay opens up its contextual menu, which enables pitch-shifting analogue-like sounds via the Time knob. Pretty cool for slight pitch variations or simply get down and dirty into the psychedelica realm. Moving on, we have Filter Delay, which is a triple Delay with filters on each of them. I find it interesting when I want to create swarm of sounds.
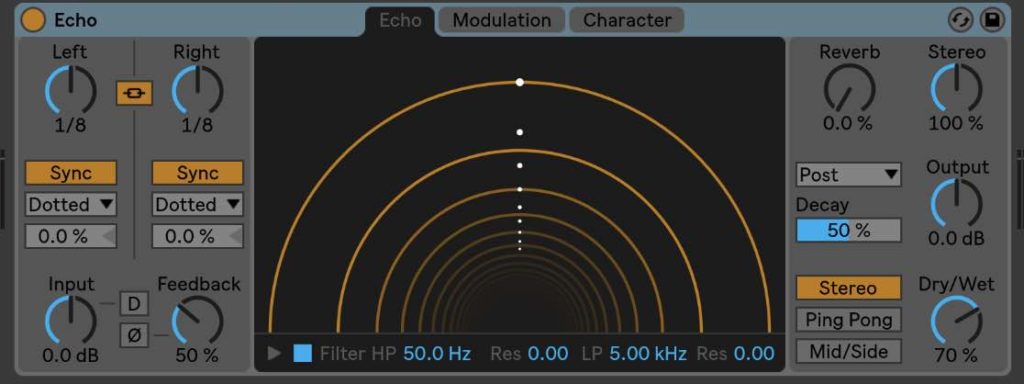 Then we get Echo. At first I thought “why another one?” Well, it’s main selling point is what the others don’t have ; character. It’s a designer’s tool, not a get the job done one. It’s perfect to add movement to pitch in a Space Echo way, or to have massive feedback builds. Very fun to toy around and fiddle with it’s many options. Dual filters, feedback-inserted reverb, visual representation of the delay pattern, two pages of modulation and character functions all add up to make this a beast of a delay. Echo truly shines when mapped to a MIDI controller, adding human expressiveness to your productions.
-
Favourites Menu
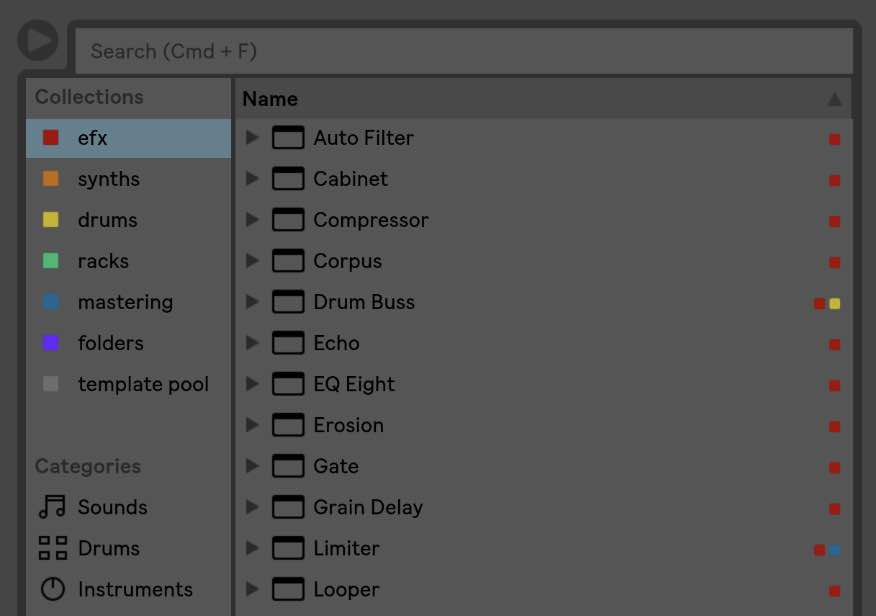 This new feature seems a bit mundane, but in the iterative context of music production it is gold. Everything in the left-hand-side-browser is tag-able. Live’s effect selection is broadening and I find myself utilizing but a handful of them on a regular basis; so I put all of my most used Live Effects into bin 1. Then, I always had to go to my User/VST directory to reach for my beloved EQs and Reverbs. No more, I simply put them into bin 1. Synths are now into bin 2. Drums are in bin 3, which includes my sample library of drums, the MIDI Velocity device and a grid humanizer M4L device. Everything in the same place! Meaning when I’m working on drums, I don’t scatter around 4 or 5 different directories to get the job done. And better yet, it makes me organize better my current folders so I can focus on my drums more. An idea I have yet to implement is to set a folder of project templates for different compositional purposes, such as scoring or songwriting or dub techno layering, leaving the original template empty for quick boot-up.
-
General workflow improvements
This is something which you only truly realize when going back to version 9. Little quirks that we got accustomed to are now tackled and even made into improvements. My philosophy for any musical instrument is as follow: maximum expressiveness while lessening the feeling of cumbersomeness. And Live 10 delivers. Simple yet truly time saving actions like double clicking on a knob to reset it’s values to zero or pressing = instead of + (Shift and =) to zoom in.
Another crucial improvement is the Drag and Drop optimization. Moving clips and dropping VSTs both caused a lot less crashes in version 10. That alone saved me around 50 crashes this year. Finally, a wonderful, under the radar feature is the creation of temporary project files, meaning you get a time-stamped version automatically saved in case of a major crash (which can occur when using third party plugins). I once had a crash coming from a Max4Live device and this feature saved me 2 hours of work. Thanks Ableton! Oh, and once you close the project, it moves the files automatically to the trash bin.
-
The Automation Mode
Another one which I did not initially understand fully, but that grew on me. Pressing A toggles between arrangement’s Clip edit/cut/delete mode to Automation edit/cut/delete. Meaning, when you do broad brushes or scan your project and accidently click, you don’t move things around by accident. Also, it means a few minor workflow improvement, such as always showing clips’ fades when Automation is toggled OFF. Further, the Automation’s grid snapping is a much welcomed addition. I find myself often working off grid now, which helps to make the music more expressive by using the pen freely, thus avoiding loops.
-
MIDI Capture Feature
This is a jam saver. It often happens, I jam like a champ and forget to record. No longer do I fear this from happening with MIDI capture. Of course, back to my introduction’s rant, at my buddie’s studio, I do not have this feature so we sometimes lose cool ideas amidst a jam.
-
MIDI Clip enhancements
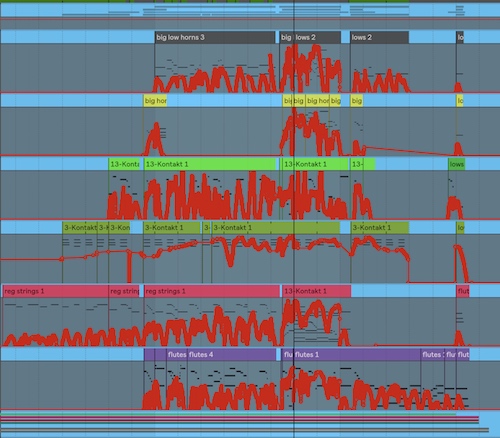
Currently in the final stage of a big orchestral piece, I’m really diving deep into the MIDI aspect of Live. Having 12 MIDI instruments all playing in harmony means a lot of Clip management. One feature which I found super fun was the multi-clip editing. Simply select the region and open up the Piano Roll. Plus you now have the track’s color assigned to it’s MIDI notes, meaning less confusion. This was super useful in the context of timing 3 instruments and especially harmonizing them.
A much time saving addition is the MIDI chase feature, which enables you to start playback in the middle of a long chord and still hear it fully, where in version 9 you’d need to start playback at the start of the note. Again, simple things that end up being major improvements in the general workflow, saving me at least 5 to 10 seconds on every playback. This is particularly useful when doing long one-note drones.
-
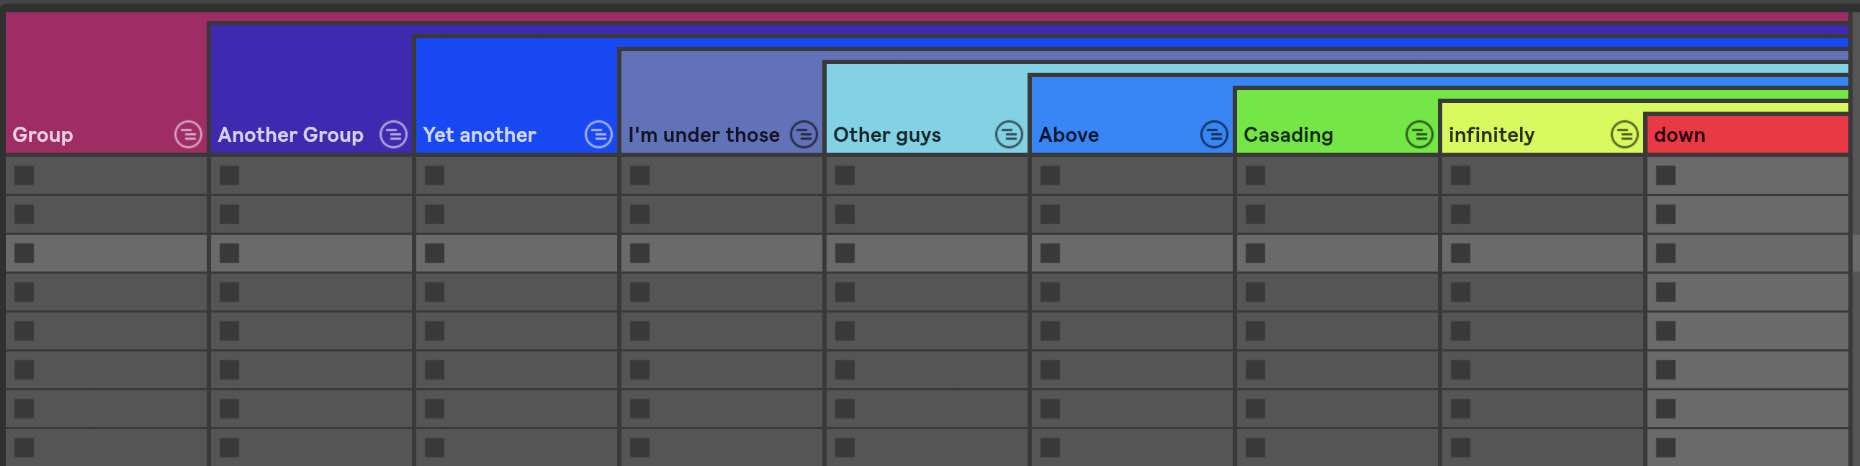
Groups within groups
OH YES! OH YES! OH YES! End of story.
-
Max4Live fully integrated into Suite
Having the partner program Max4Live fully integrated comes with many under-the-hood improvements. Better usage of CPU and RAM, easier installation, faster loading time, less prone to crashes. Also bundled are the Envelope Follower and LFO devices, both of which I use in every dub techno project. The envelope follower is soooo fun. You can use your mic input and start clapping to trigger a chord. Add in a Random note generating MIDI device and you can start creating mayhem… You get the idea. More on this technique in a future article.
-
Arrangement Overhaul
Some minor additions that should be noted are the betterment of the Reverse function. Albeit not my most used function, I often find myself needing a reversed sample to enhance a buildup. It use to be that you had to reverse the full clip. Now simply make a selection (or shorten the size of the clip), reverse et voilà! Yes, it saves 5 seconds, but I like saving my minutes when I’m in a moment of flowing inspiration.
One hidden feature that got improved is the area highlighting. When you highlight (in blue) a certain zone, you can now focus on that region better. If it’s a MIDI clip, it’ll crop and focus only on the notes selected. If it’s an Audio clip, it will zoom in on the audio portion, be it a few samples in size. A neat little trick added is the Highlight + Z, which zooms the whole Arrangement view into the highlighted region. Pressing Shift + Z returns back to a broad view. Again, saves 5 seconds of time.
And so this rounds up my 10 reasons to go Live 10. Saving seconds and minutes is crucial in the compositional process. And having produced hundreds of songs, I know from experience that the initial downpour of ideas is what makes or breaks a song. Wasting these precious minutes trying to find where I left my subby kick drum or going through a deep list of synth sub-folder to grab my saved presets is counter-intuitive.
I believe Ableton has stepped up their game and made this release a totally worth-it upgrade. Yes, I’m a power user, so this may not apply to all. But again, I value great instruments, and I think Live 10 is a greater instrument than its predecessor.
Article by Pōe


![A first look into Ableton Live 10 [Music Production]](https://husasounds.com/wp-content/uploads/2018/02/header-600x350.png)
Comments